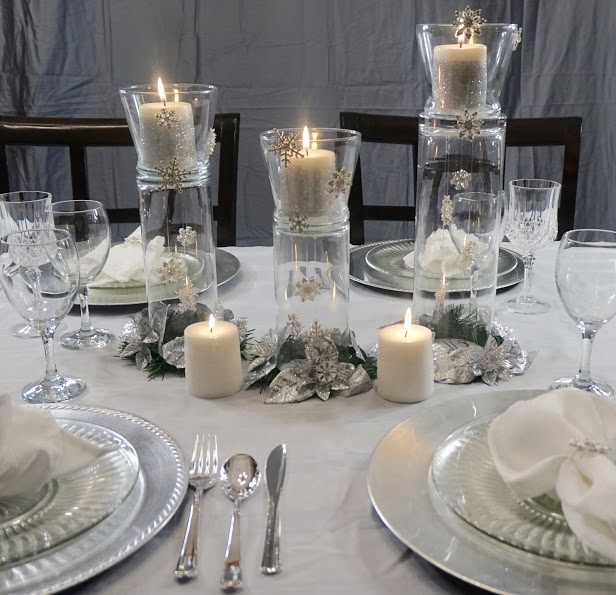
It’s beginning to look a lot like Christmas! Join us this week as we set the table with this beautiful Snowflake Christmas Centerpiece!
Let’s Get Started:
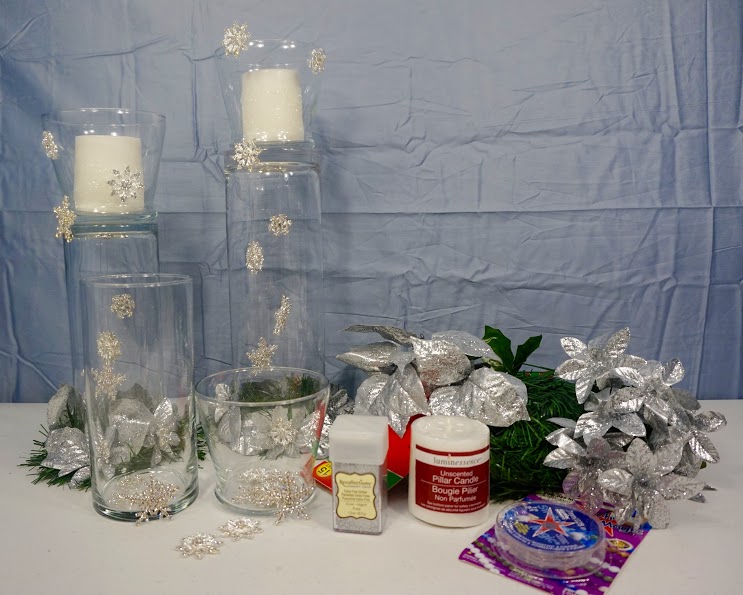
SUPPLIES YOU WILL NEED:
1- 3 1/2 in Roman Urn Glass Votive Holder
1- 7.25 in Glass Cylinder Vase
1- 5 Stem Silver Poinsettia Bushel
1- Luminescence Votive Candle
1- Sulyn 2oz Glitter Stacker Jar- Sterling Extra Fine Glitter
1- 15ft Faux Pine Garland
1- Stretch Magic Beading Cord 5m,clear
4- Large Diamanté Snowflake Flat Back
4-Med Diamanté Snowflake Flat Back
4-Small Christmas Rhinestone Flat Back
Directions:
STEP 1:Create your 1 piece vase by gluing the Smooth Glass Hurricane Candleholders, 4″ to the Glass Cylinder Vases, 7.25in with your E6000 glue. Flip the cylinder vase over. Let it sit for about 1 to 2 hours.
STEP 2:Make a snowflake mobile. Cut a 6inch strip of beading cord. Take your snowflake gem and loop beading cord through. Tie a knot. To secure tie a double knot or slip knot. Hot glue a snowflake to the backside of the current snowflake to create a 3D effect.
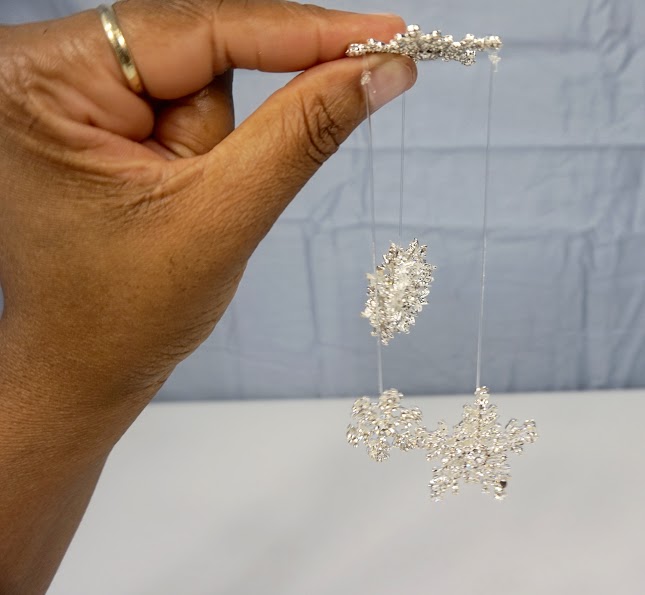
STEP 3:Repeat step 2 using different sized snowflake gems. Attach snowflakes to each other to create a mobile look leveling at different lengths. Add hot glue to the middle of the anchoring snowflake gem.
Tip: Be careful not to burn your fingers on the hot glue.
STEP 4:Glue anchoring snowflake gem to the bottom of the vase. Hold for 5 minutes. Make sure mobile is secure. Flip Vase Over. Use wire cutters to cut 12inches of garland, wrap and twist garland around the bottom of the vase.
Tip: You can add 2 rows of garland for a fuller look.
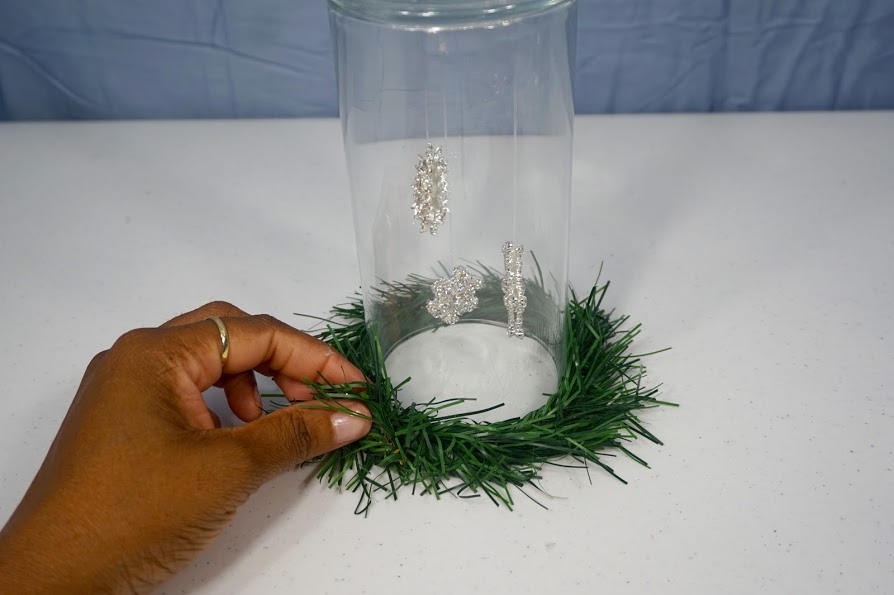
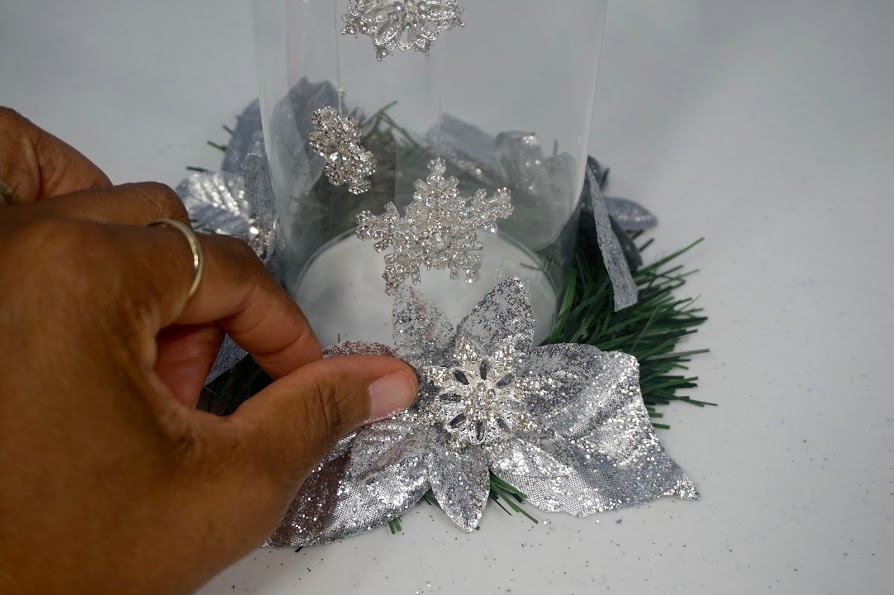
STEP 5: Remove leaves and flowers from bundles. Glue leaves on each side of flower to create a Poinsettia. Add snowflake to the middle of Poinsettia. Glue in the middle of the bottom of the vase on top of garland. Let sit for 5 minutes to dry. Get creative adding the remaining snowflake gems to the vase.
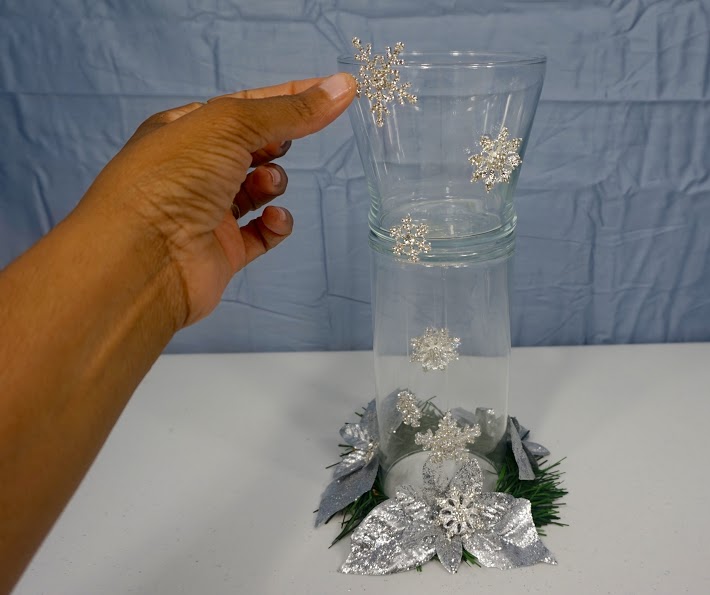
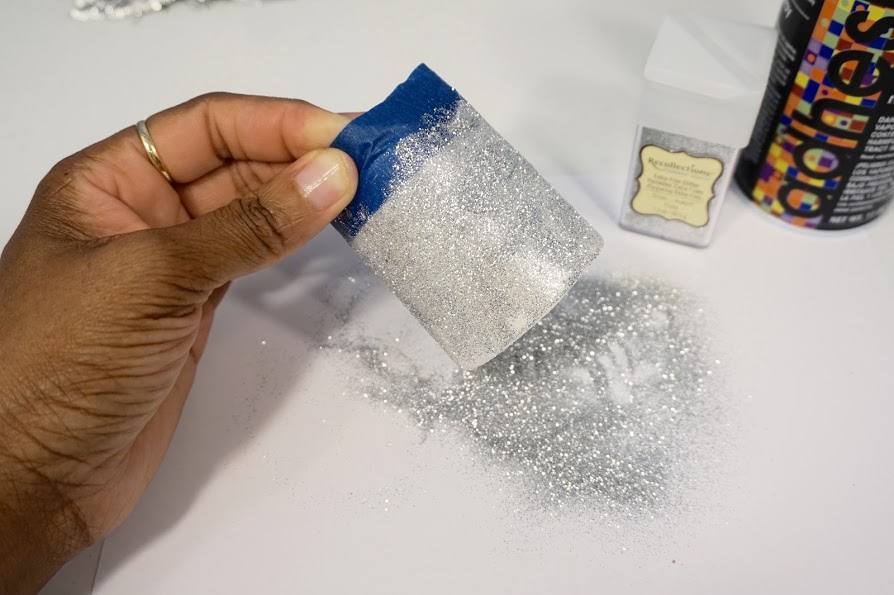
STEP 6: Take painter’s tape and tape 0.25 inches from the top of your candle. Spray adhesive spray on candle. Sprinkle glitter on candle. Roll candle in glitter to cover missing spots. Let it dry. Remove tape.
STEP 7: Follow steps 1-6 to create multiple vases for your table.
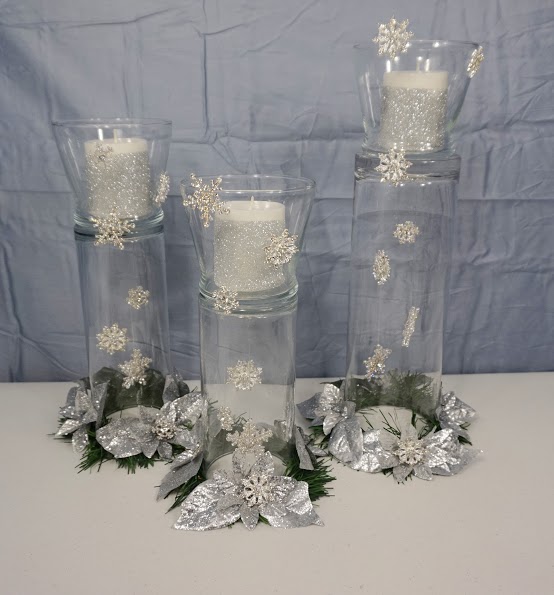
If you like the outcome please let us know in the comments below? Also share your ideas on what you would have done differently?
Need help with an upcoming project? Be sure to send us a project request!
“Remember When Every Penny Counts, Count on MissPlanIt”


