


Lavender Dream! Real Touch Bridal Bouquet!
THIS POST MAY CONTAIN AFFILIATE LINKS. PLEASE READ MY DISCLOSURE FOR MORE INFO.
THE PERFECT BOUQUET FOR YOUR WALK DOWN THE AISLE!
Hi guys! Have you ever wondered how to create a realistic bouquet with artificial flowers? Well that exactly what Im going to show you how to do. This step by step tutorial will show you how to create this gorgeous Lavender Dream Bridal Bouquet! With everything so expensive it is very difficult to get beautiful decor on a tight budget. This bouquet is not only beautiful but cost effective. So what are we waiting for? Let’s get started!
BUT WAIT!
Before we get started I want to share an awesome tip on how you can earn cash back with your online purchases for all the items you will need to complete this project!
As our saying goes “When Every Penny Counts, Count on Miss PlanIt.” We love to save money and get great deals. Prior to us purchasing anything online, we check out Rakuten, find the store, click the current deal for that store and complete our purchase.
If you have never used Rakuten, you are MISSING OUT. So for this project, you would go to Rakuten.com, sign up, and then type in the store you plan to purchase from.
When completing a purchase through Rakuten you earn cash back that you can have mailed to you or sent via PayPal. Be sure to check it out! Click here to sign up for Rakuten, and RIGHT NOW when you sign up, you will receive a $10 cash welcome bonus through my link when you spend $25.00!
You were already going to complete your purchase online, so why not get some cash back on things you already planned to purchase!
Let’s Get Started:
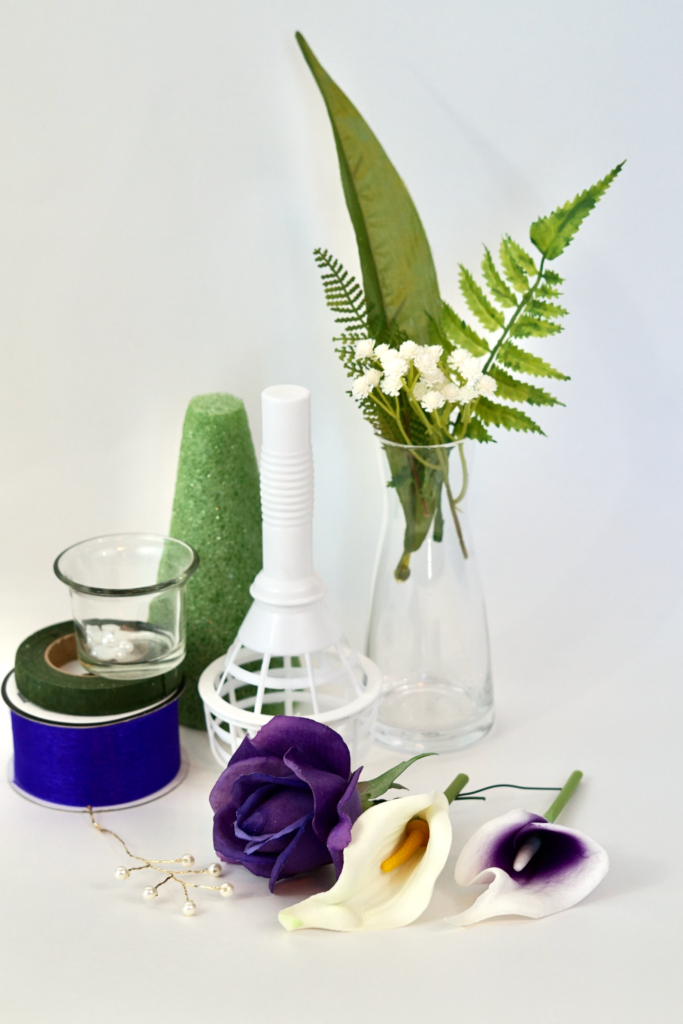
Click the links below to purchase the supplies needed for this project:
- Bouquet Holder
- Foam Cone
- Floral Tape
- Organza Ribbon
- Purple Roses
- Calla Lillies
- Purple Calla Lillies
- Babies Breath
- Boston Ferns
- Magnolia Leafs
- Pearl Stickers
- Pearl Picks
Project Video:
If you prefer written instructions, please continue reading.
Let’s Create This Lavender Dream Bouquet!
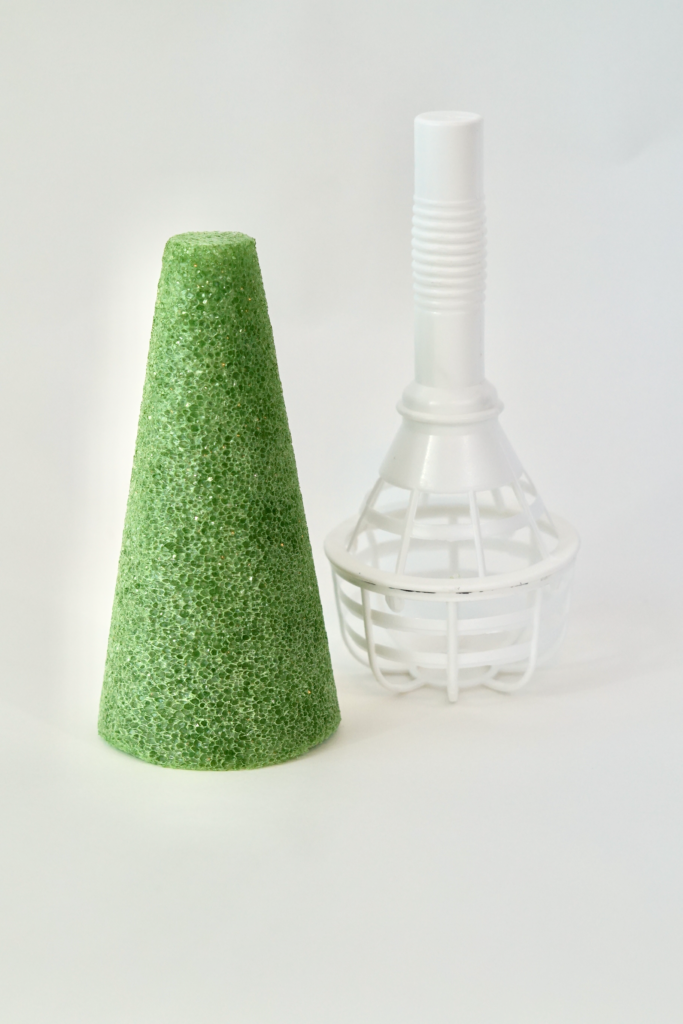
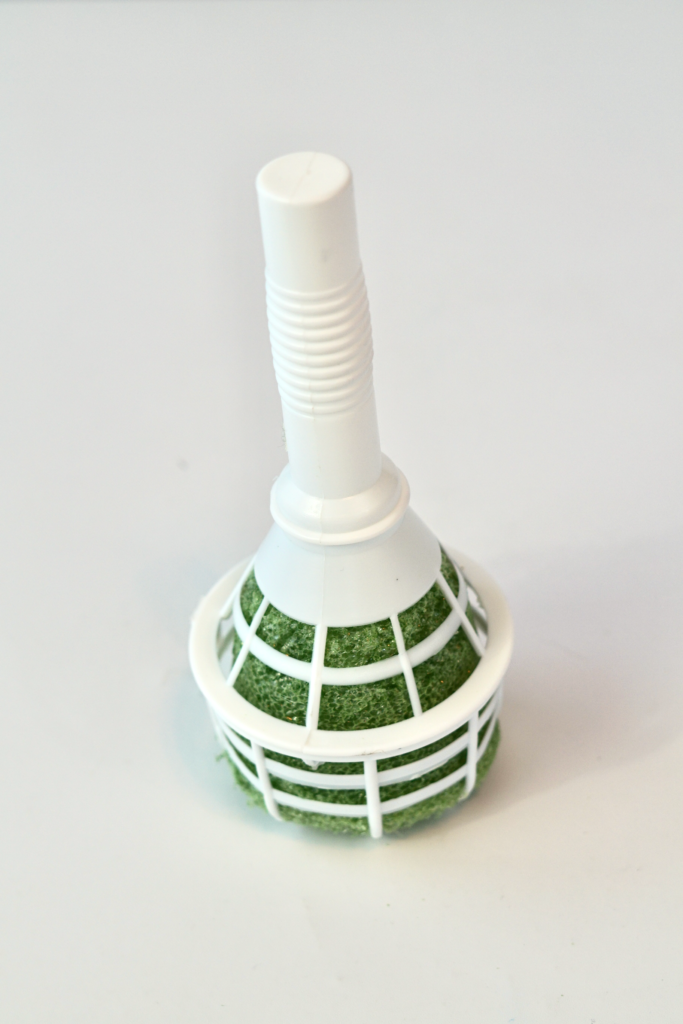
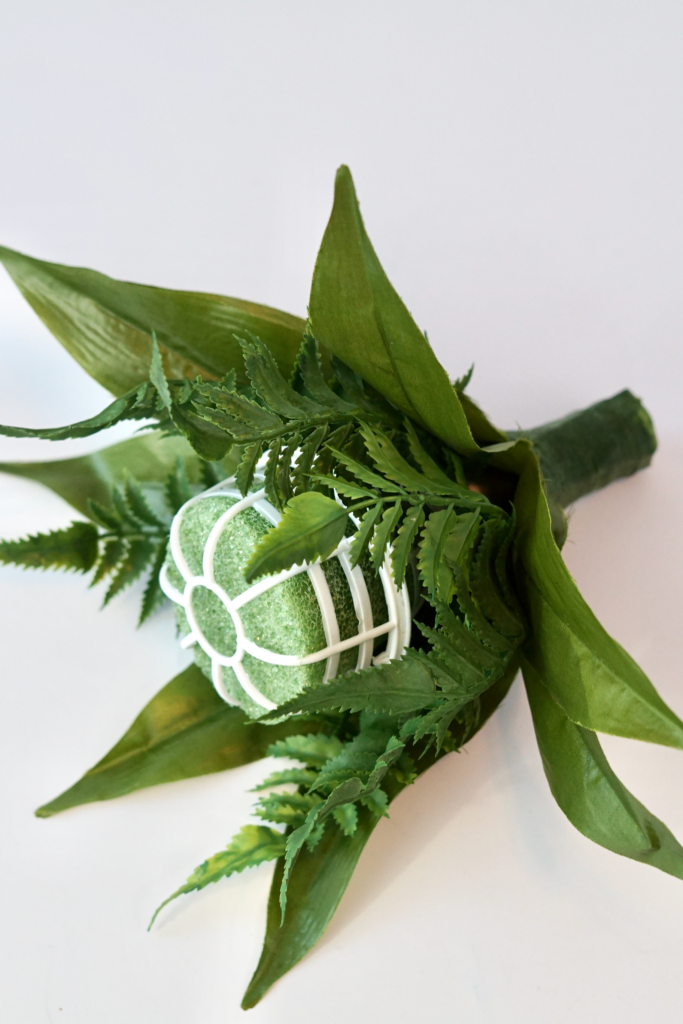
STEP 1:
Let’s create the foundation for this bouquet using a bouquet holder and styrofoam cone. Trim down the cone to fit into the handle cage. Add a touch of hot glue to the cage rim for additional stability.
Layer On The Layers!
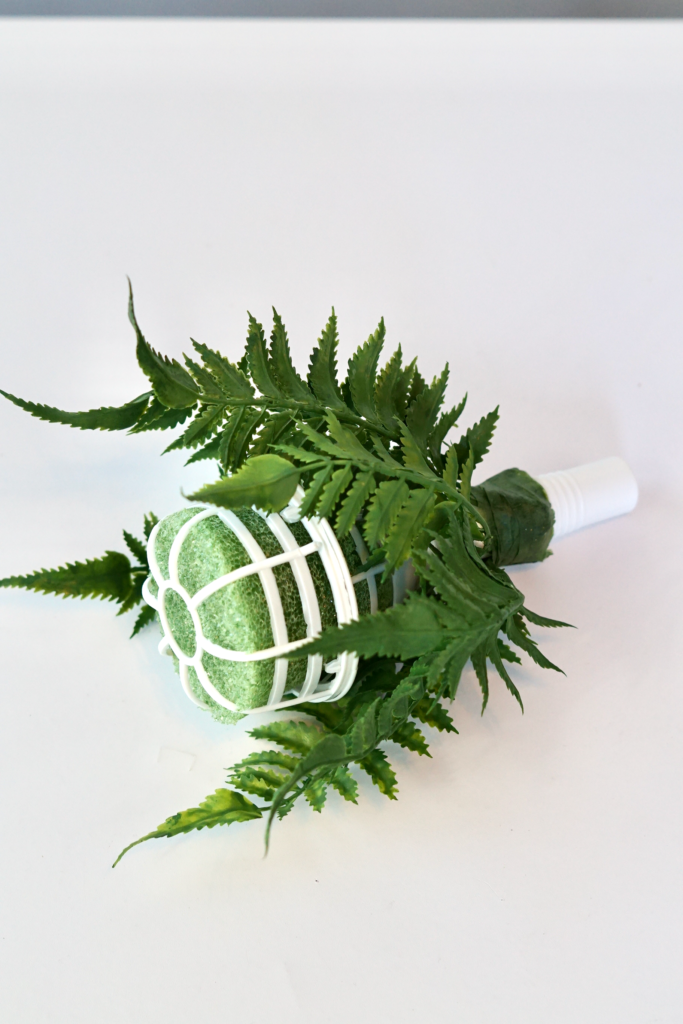
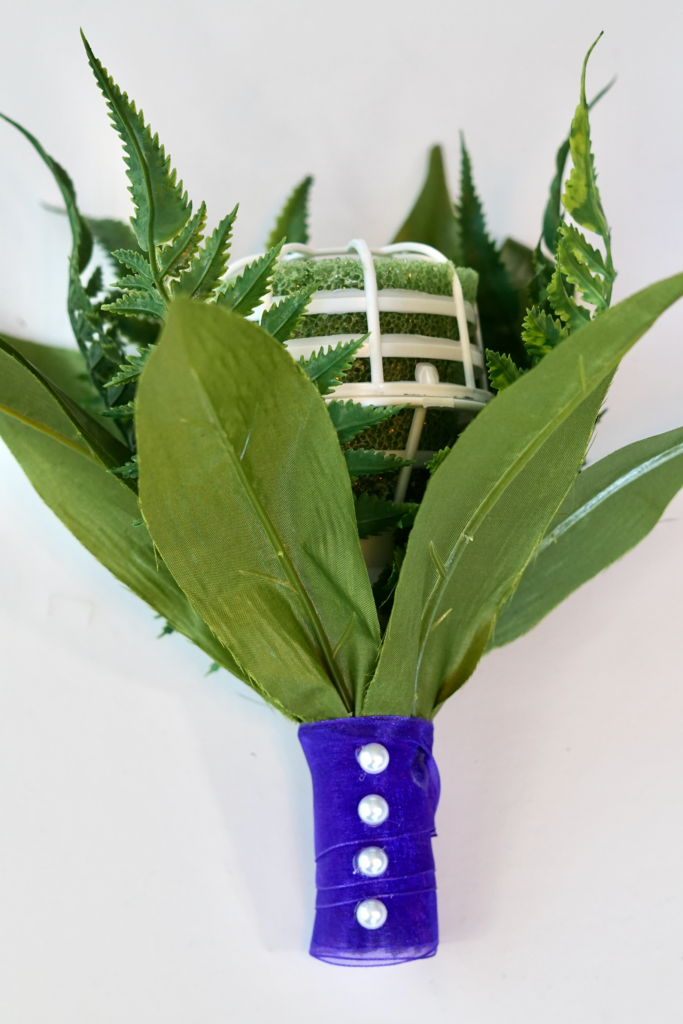
STEP 2:
Next we are going to attach 6-8 Boston Fern Stems and 6-8 Magnolia Leaves. A quick tip place a rubber band to the handle to hold the leaves in place. Attach the leaves to the handle with Floral tape.
STEP 3:
Before we continue with out floral additions we should complete the bouquet handle decor. Wrap the handle in Purple Organza Ribbon. Once completely covered, seal the end of the ribbon with hot glue then add 3-4 Pearl stickers. You can use a touch of hot glue to add extra security to the sticker application.
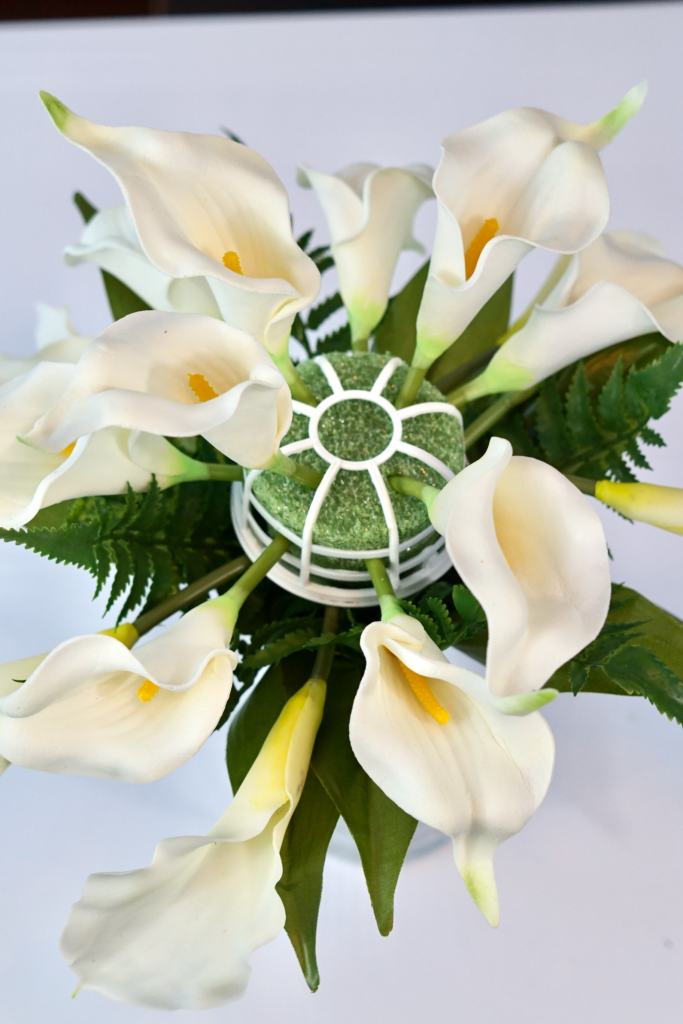
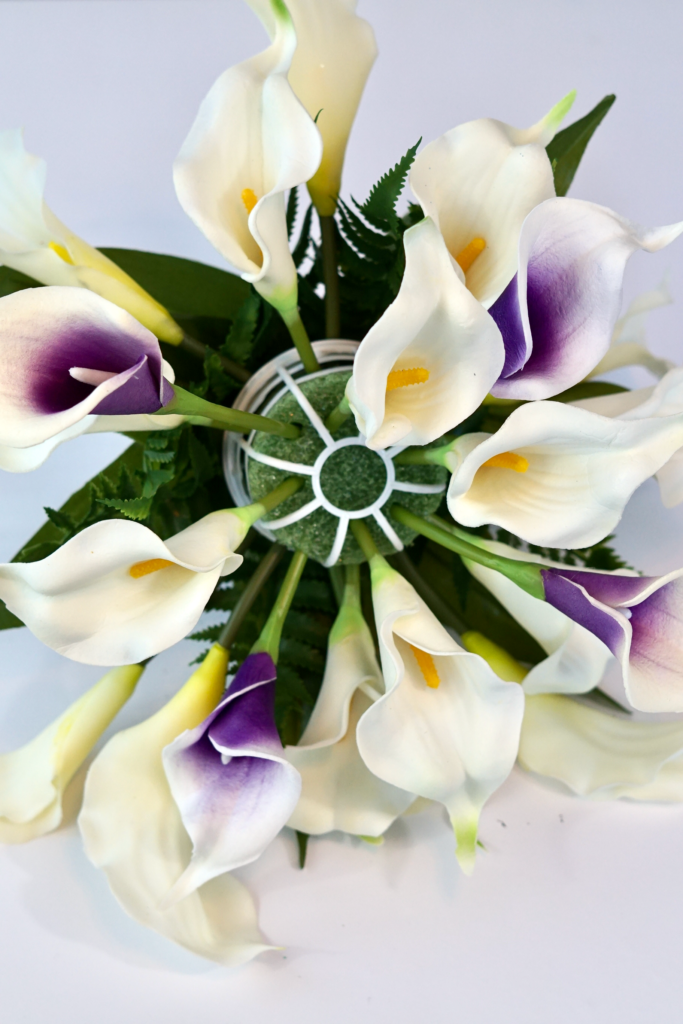
STEP 4:
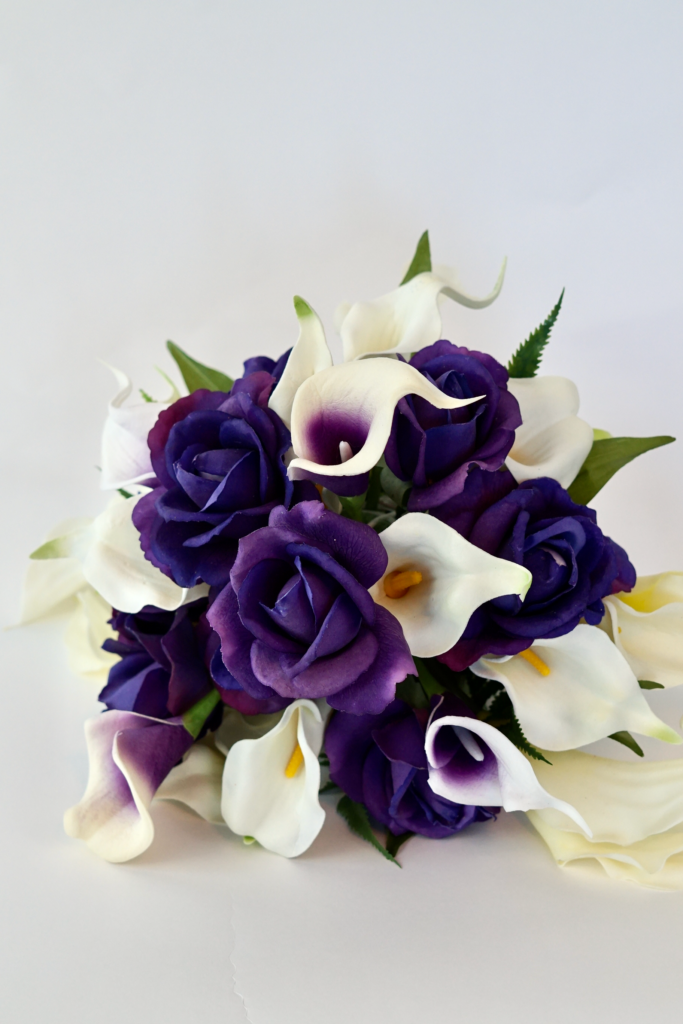
Now its time to attach 15-20 Cream Calla Lillies and 4-6 Purple Calla Lillies. Be sure to space them apart to create depth.
You Have Options!
STEP 5:
Finally attach 4-6 Purple Real Touch Roses. Feel in any empty space with Babies Breath Stems. For an extra touch of glam, add Pearl and Gold Wire Picks.
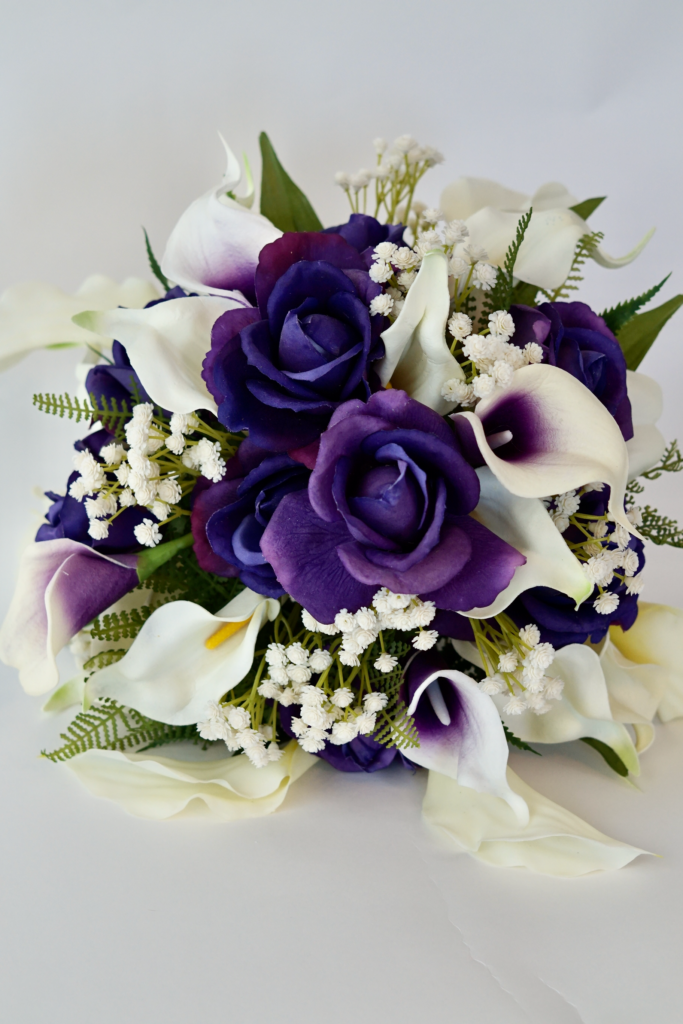
THE FINAL STEP:
Remember guys, we give you the plan and you make it your own. Play with it! Add flowers and colors that speak to you. Trust yourself! YOU CAN DO THIS!
Don’t forget to sign up for Rakuten to earn cash back on your online purchases. Planning a wedding is expensive, our goal is to help you stay within your budget and make every penny count. Click here to sign up for Rakuten, and RIGHT NOW when you sign up, you will receive a $10 cash welcome bonus through my link when you spend $25.00!
If you like the outcome please subscribe to our Youtube Channel for more DIY Videos and follow us on Facebook and Pinterest. Also if you need help with an upcoming project be sure to send us a project request! “Remember When Every Penny Counts, Count on MissPlanIt”THIS POST MAY CONTAIN AFFILIATE LINKS. PLEASE READ MY DISCLOSURE FOR MORE INFO.