


Tall Modern Wedding Centerpiece!
THIS POST MAY CONTAIN AFFILIATE LINKS. PLEASE READ MY DISCLOSURE FOR MORE INFO.
Tall Wedding Centerpieces That Makes a Statement!
I’m always excited to take on a new creative challenge! When one of our wonderful followers suggested we make a gorgeous Tall Modern centerpiece, that’s also cost conscious, I couldn’t resist. We’re all about bringing your visions to life, no matter what your budget is. With so many DIY enthusiasts looking for affordable ways to make their celebrations extra special, we’re here to help! If you’re on the hunt for clever, cost-effective ideas that still wow, you’re in the perfect spot. Ready to get inspired? Let’s jump right in!
BUT WAIT!
Before we get started I want to share an awesome tip on how you can earn cash back with your online purchases for all the items you will need to complete this project!
As our saying goes “When Every Penny Counts, Count on Miss PlanIt.” We love to save money and get great deals. Prior to us purchasing anything online, we check out Rakuten, find the store, click the current deal for that store and complete our purchase.
If you have never used Rakuten, you are MISSING OUT. So for this project, you would go to Rakuten.com, sign up, and then type in the store you plan to purchase from.
When completing a purchase through Rakuten you earn cash back that you can have mailed to you or sent via PayPal. Be sure to check it out! Click here to sign up for Rakuten, and RIGHT NOW when you sign up, you will receive a $10 cash welcome bonus through my link when you spend $25.00!
You were already going to complete your purchase online, so why not get some cash back on things you already planned to purchase!

Let’s Get Started: Click the links below to purchase the supplies needed for this project:
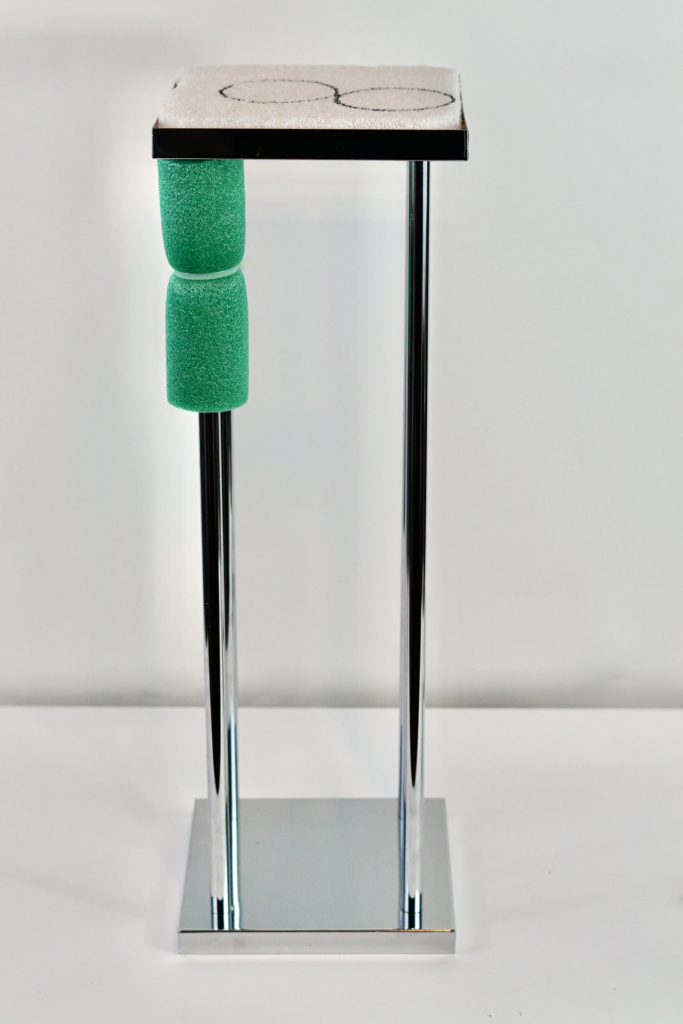
- Flower Stand
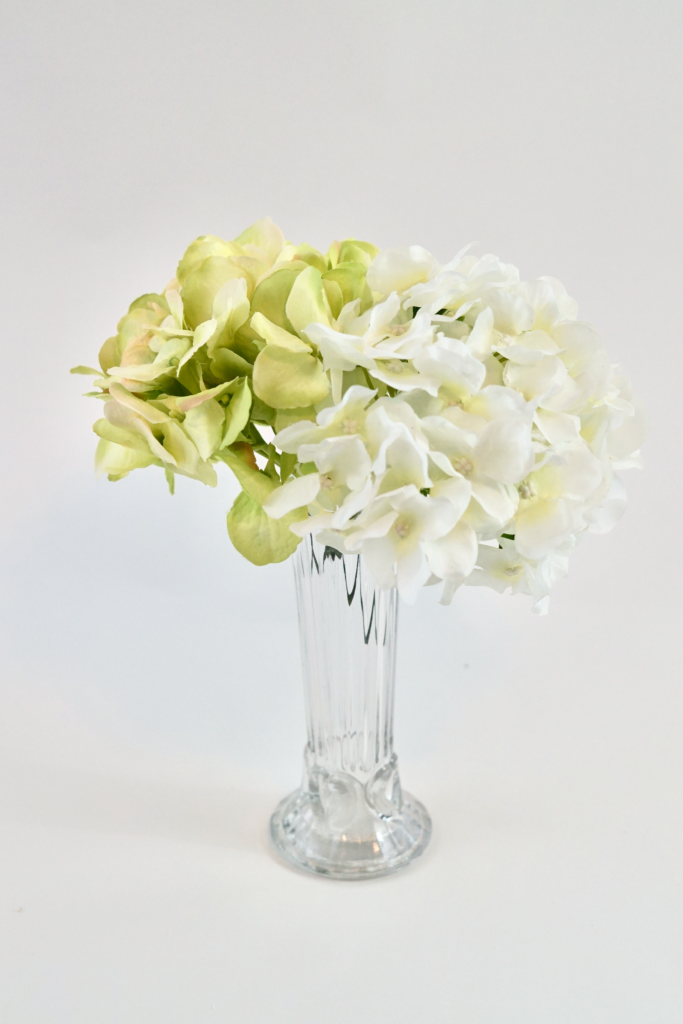
- White Hydrangea
- Green Hydrangea
- Pink Poppies
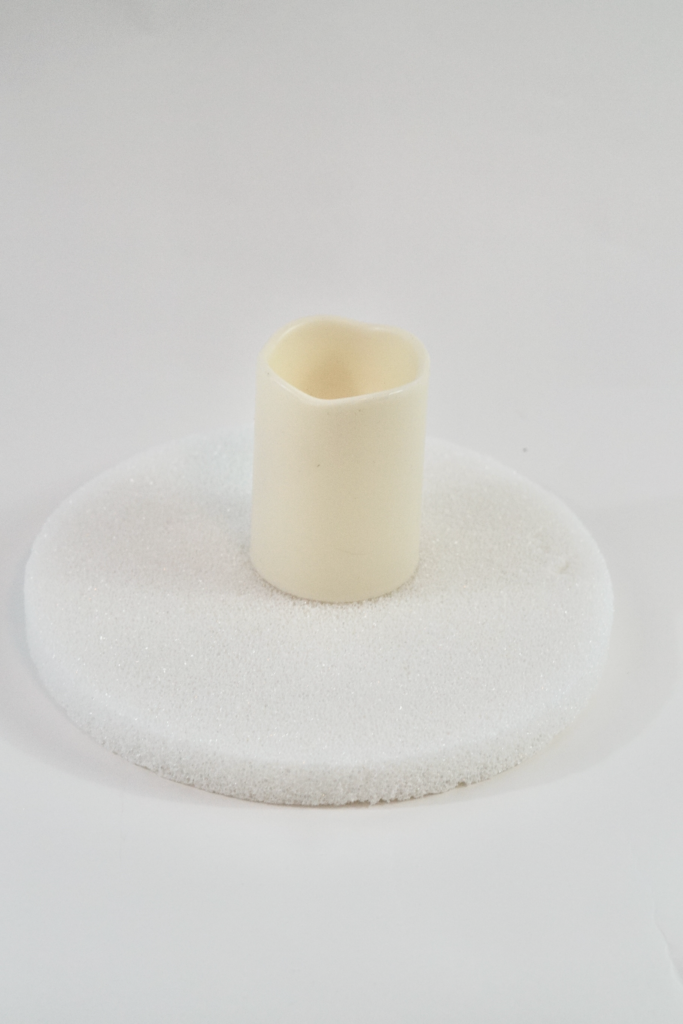
- LED Pillar Candles
- Styrofoam Disc
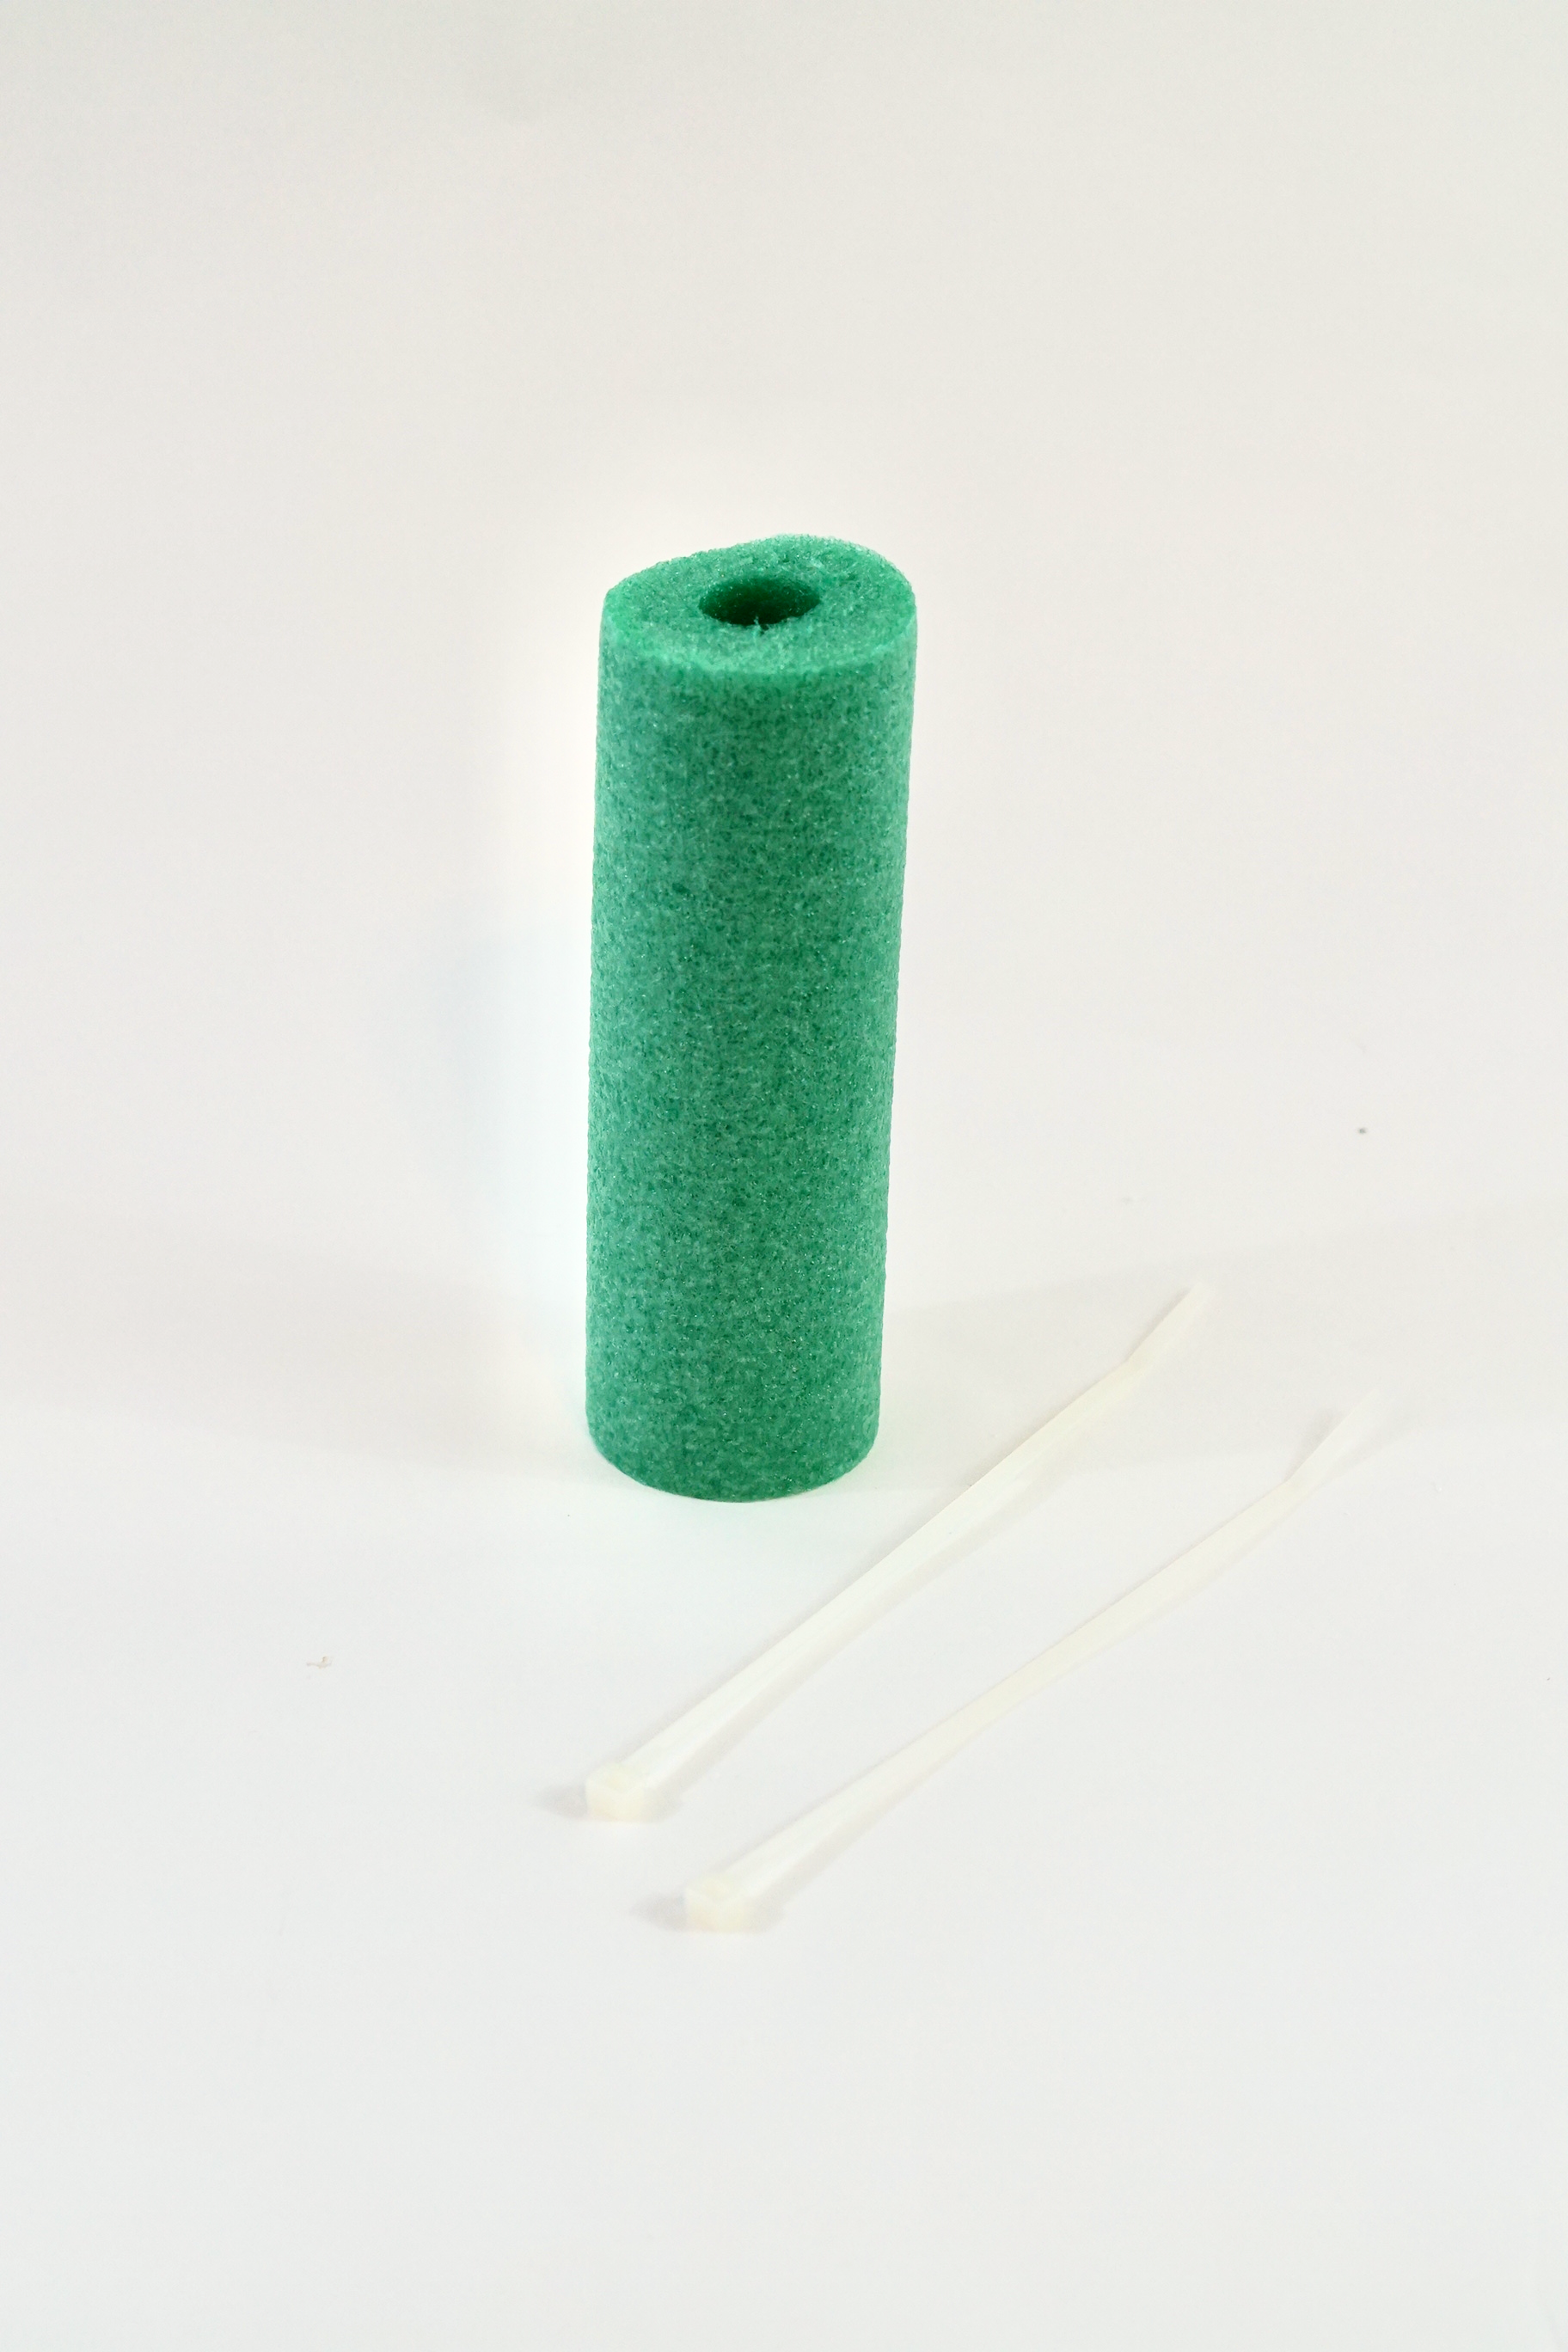
- Pool Noodle
- Zip Ties
- Styrofoam Cutter
Project Video:
If you prefer written instructions, please continue reading.
Affordable Wedding Decor Tips for Every Couple!

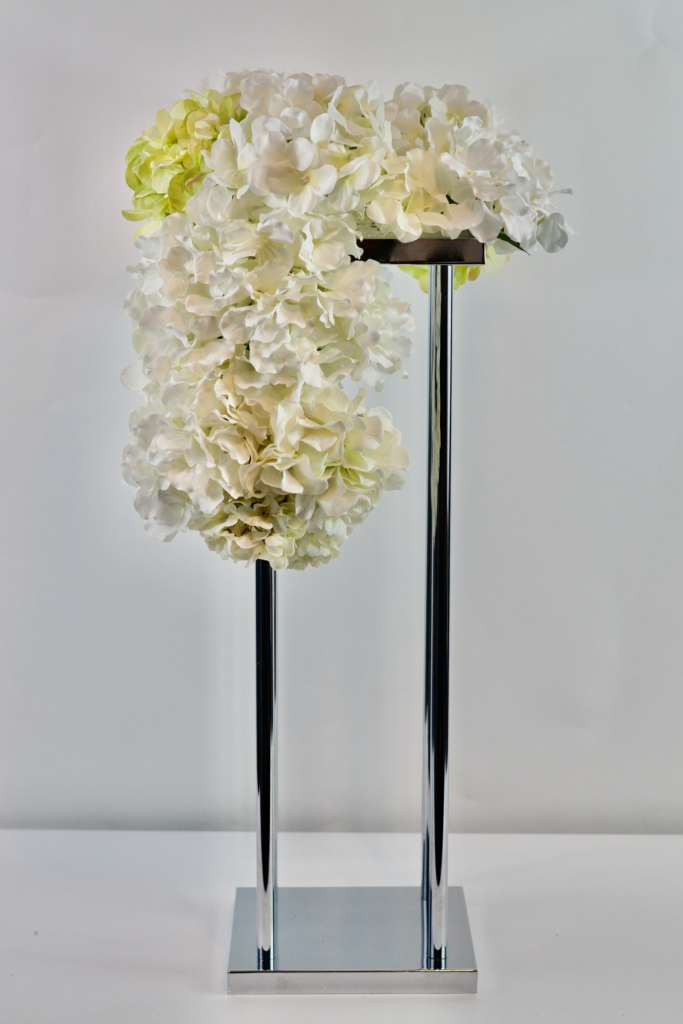
Step 1:
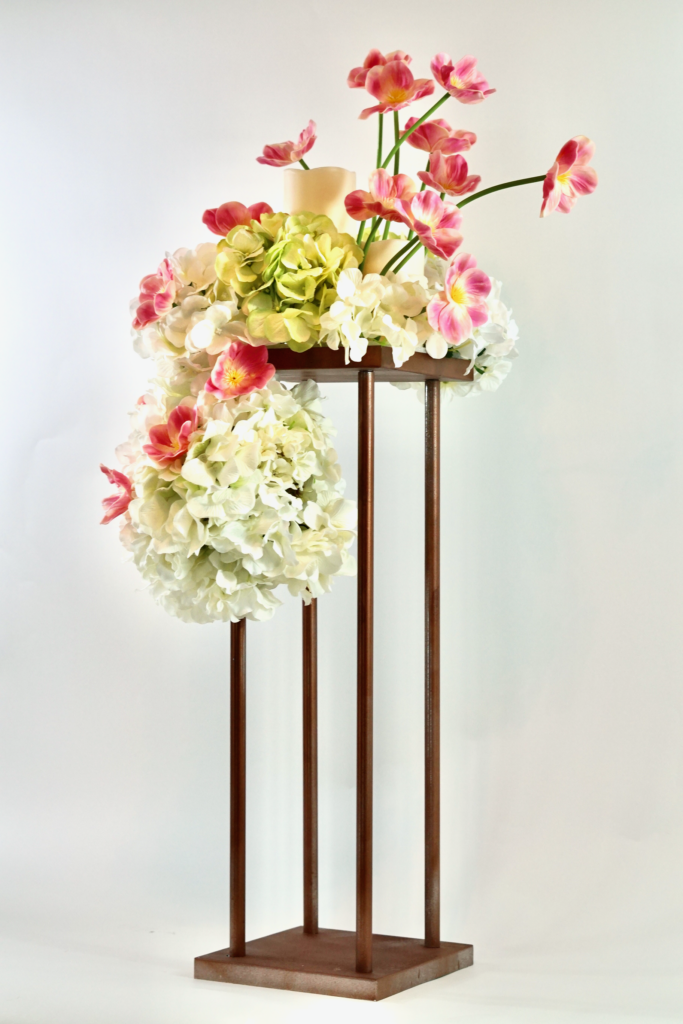
We will start our project by putting together the 24 inch Flower Stand. Next we will trace the outline of the LED Pillar Candle onto the Styrofoam Disc. Trim the styrofoam disc to fit the top of the flower stand. Cut a 6 inch piece of Pool Noodle, cut one side with the Foam Cutter. Wrap the top of 1 leg of the flower stand with the pool noodle and secure with a 12 inch Zip Tie. Be sure to cute off the excess Zip Tie.
Elevate Your Wedding with this Stunning Centerpiece!
Step 2:
Start by placing 12-16 vibrant Green and White Hydrangeas on the base of the Styrofoam and around the edge of the Pool Noodle. Afterward, gently arrange the Hydrangea to fill in any gaps, ensuring a lush, full look. Be sure to leave enough room for the Pillar Candles to be added later for a magical touch!
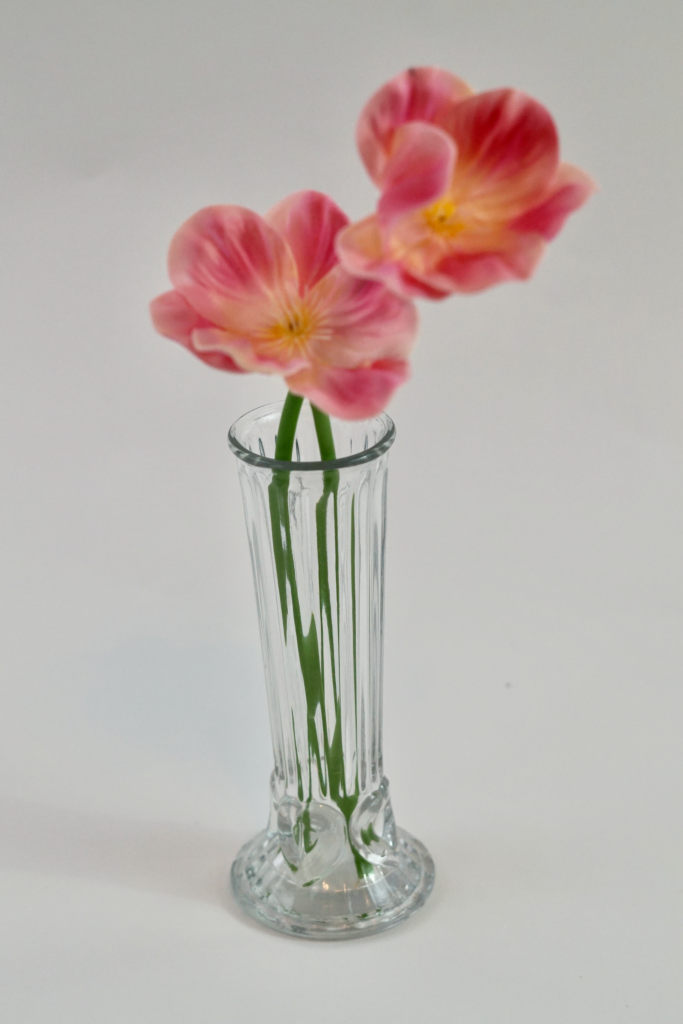
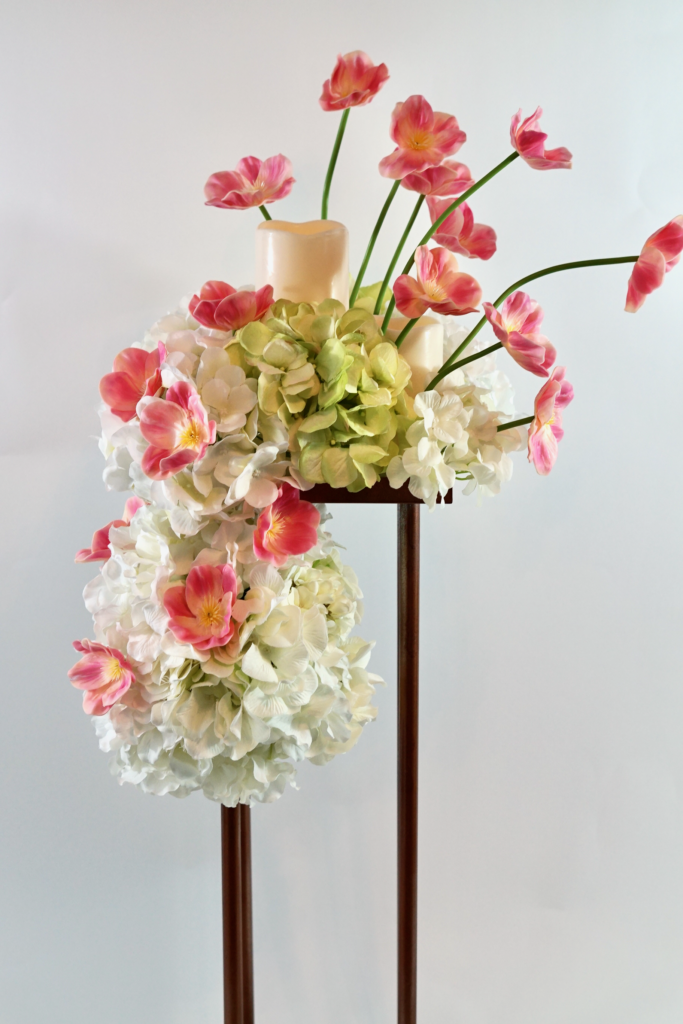
Step 3:
Next, arrange 8-12 Pink Poppies on the top of the floral arrangement, varying the stem lengths for a natural, cascading effect. Feel free to bend the stems into different angles to achieve your desired shape. To enhance the display, you can add extra Poppies along the sides, creating a beautiful flow of color throughout.
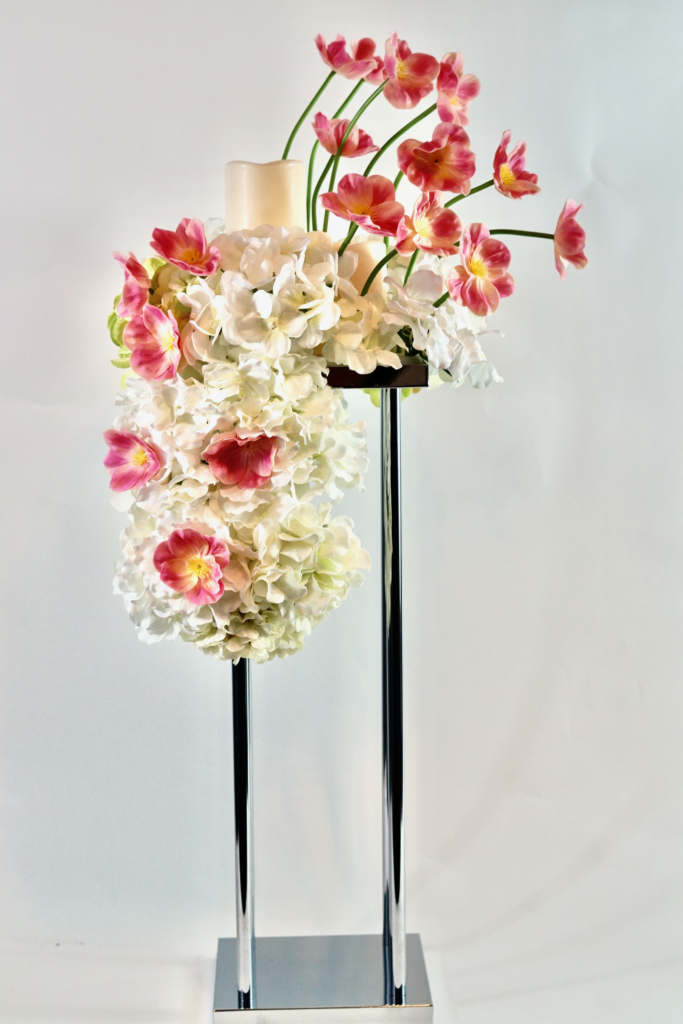
THE FINAL STEP:
An Unforgettable Day, Simplified!
Who knew that crafting the perfect wedding could be so simple and affordable? We’re incredibly thankful to have played a part in making this day as beautiful as your love story. A huge thank you to all of you for letting us be part of your unforgettable celebration! Here’s to love, joy, and a lifetime of happiness together!
Don’t forget to sign up for Rakuten to earn cash back on your online purchases. Planning a wedding is expensive, our goal is to help you stay within your budget and make every penny count. Click here to sign up for Rakuten, and RIGHT NOW when you sign up, you will receive a $10 cash welcome bonus through my link when you spend $25.00!
If you like the outcome please subscribe to our Youtube Channel for more DIY Videos and follow us on Facebook and Pinterest. Also if you need help with an upcoming project be sure to send us a project request! “Remember When Every Penny Counts, Count on MissPlanIt”